

Falcon Special
There is a certain utilitarian elegance to profile models used in Goodyear racing classes. I have made many ‘Deerfly’ and ‘Swee’ Pea’ models in 1/2A (1.5cc / .o9cu in motors) size. I have harboured a desire for a 1/8th scale Swee’ Pea for a while, as it is such a sweet handling 1/2A model. However the jury is out on the ground handling characteristics of this model when flown off tarmac. I have a few ideas to make it work, but that’s a project for another day.
Having built a Deerfly /Argander Special in the past and fancying a change, I settled on the Falcon Special. This raced in the late 1940’s and tracking down information has been hard. I wanted to build this model as I think aesthetically it looks the part and will give the flying characteristics I want. Plus it makes a change from the standard Ol’ Blue….
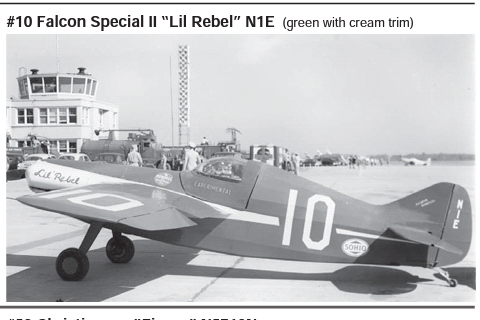
Whilst considering the model design I obtained a John Kilsdonk plan, kindly sent to me by Rod Parsons in Australia. This is a classic and popular design, particularly down under. I tracked down the 3 view below with reference measurements and scaled a plan at 1/8th, making sure it hit the 9.6dm sq required under BMFA rules.


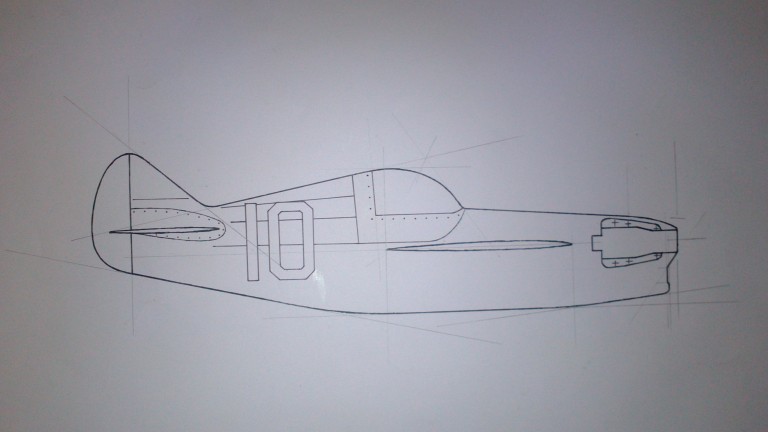
I chose to use the rounded canopy version shown on the left of the scale drawing.
After making a few sketches I came up with the the initial fuselage profile. It shows some scale detailing as it was always my intention to give it a decent scale-like finish. I have produced a full scale plan which in time I will submit to Outerzone .
You may notice the spacing is for a Profi F2CN motor but this idea ( for Open Goodyear ) has been shelved in favour of a Oliver British Goodyear motor for 2016. I’ll mount this on a Rothwell style plate. The wing will also be moved up, detailed on the models below, as I like the look of Kilsdonks design with under wing tank layout.


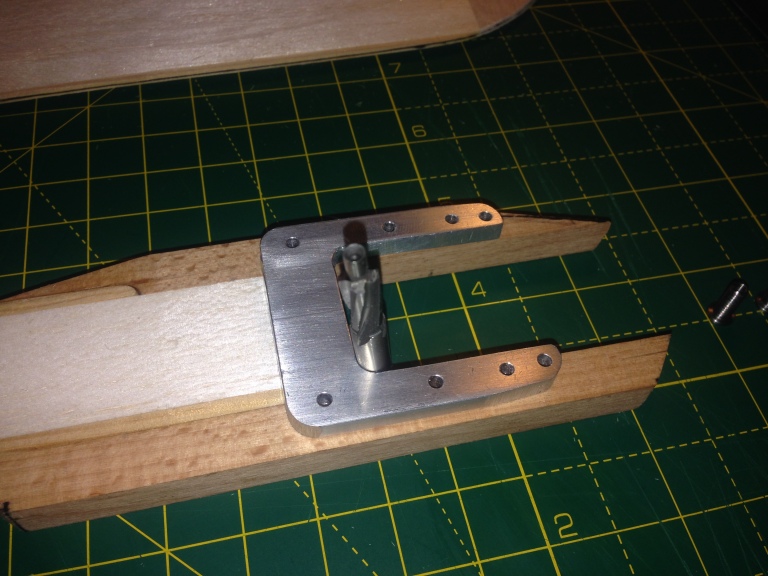
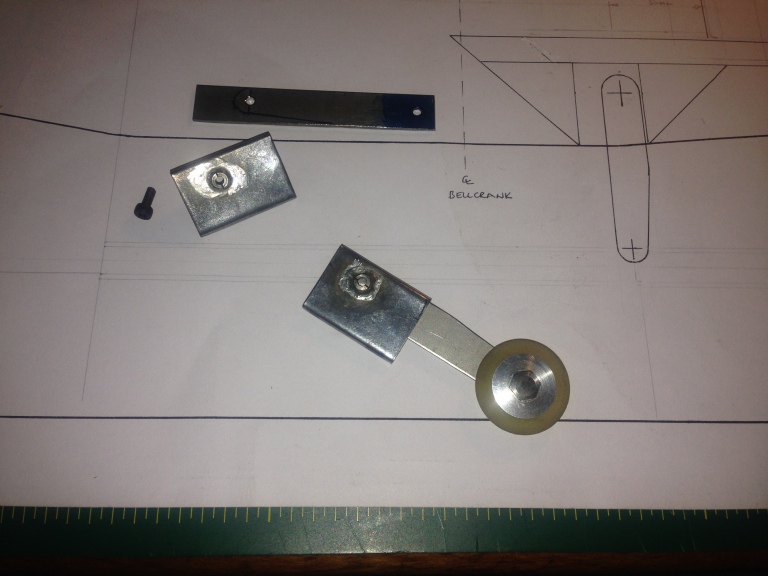
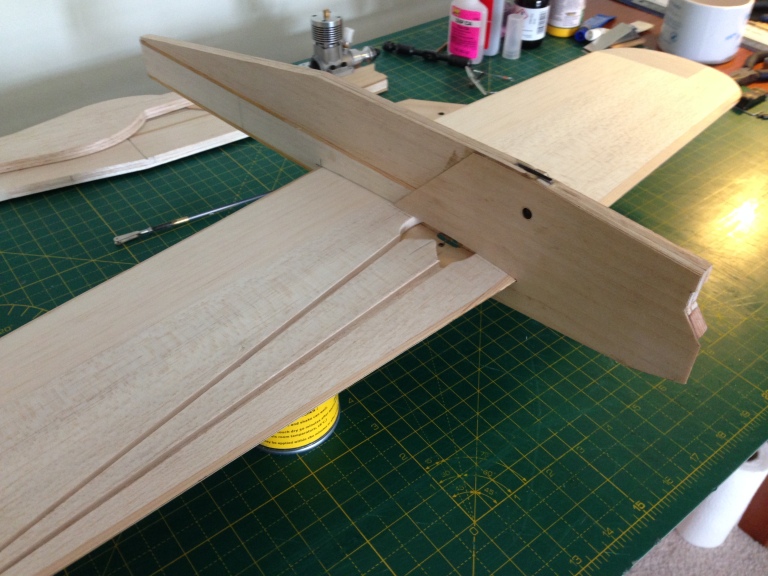
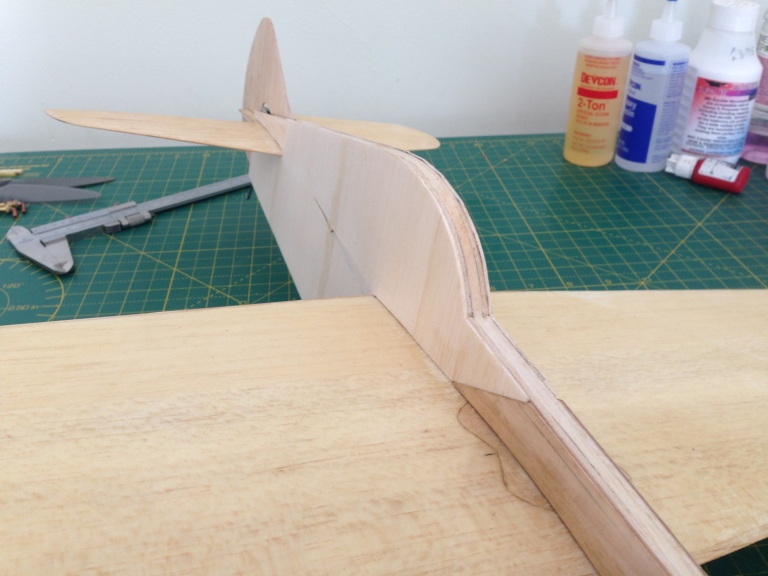
The wing and tailplane layout present little difficulty apart from the exact bellcrank pivot point. Clearance was extremely tight in construction but the final measurement was accurate enough to allow the pushrod to run internally.
The fuselage construction became very time consuming just in the planning, and it was necessary to make all the hardware in advance. I made up an engine plate from 4mm aluminium, m3 bolts for the motor and m2.5 for the hold downs. The engine plate would also serve as the front tank mount.
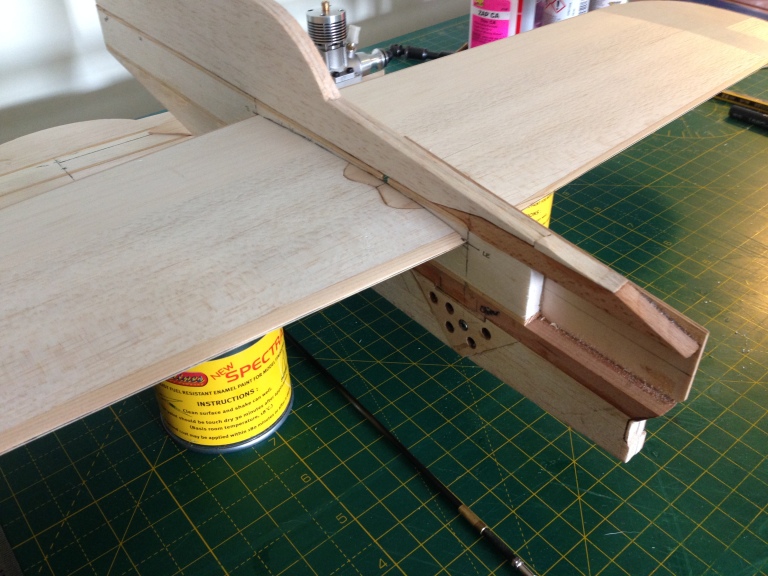
The tank is from tin and features mounting and hardware from Ed Needham.
The wheel is also from Ed, with 2mm titanium leg and wheel box from tinplate. In order to keep fuel soak to a minimum I decided to access the pivot bolt from inboard and sleeve it with brass tube.
The wheel box is located on the bottom bearer, supported by drilled 1/8th ply plates and hard balsa fillets. In order to support this structure the lower fus was laminated from 1/8th balsa.

")
Goodyear models are subject to high lateral loads at fast stops so I went for the standard 2 x full fus. length 1/8 x3/8 spruce strengtheners. The front of the fuselage has 1/16th ply doublers and a 3/4 cheek, scale-ish in profile. I believe this is a is belt and braces approach, subsequent models may well feature lighter weight construction.
Once the wing was completed and glassed, it was 24hr. Araldited in position. Then the tricky work began.
")
")
A 3mm carbon pushrod was made with a brass sleeve to attach the cut-off wire. The tail was tacked in position to check pushrod clearance. A small diameter tube was added for the cut-off wire, trying to maintain as direct a line as possible. After much faffing around clearances were established with a as ok and the fus. top was added.
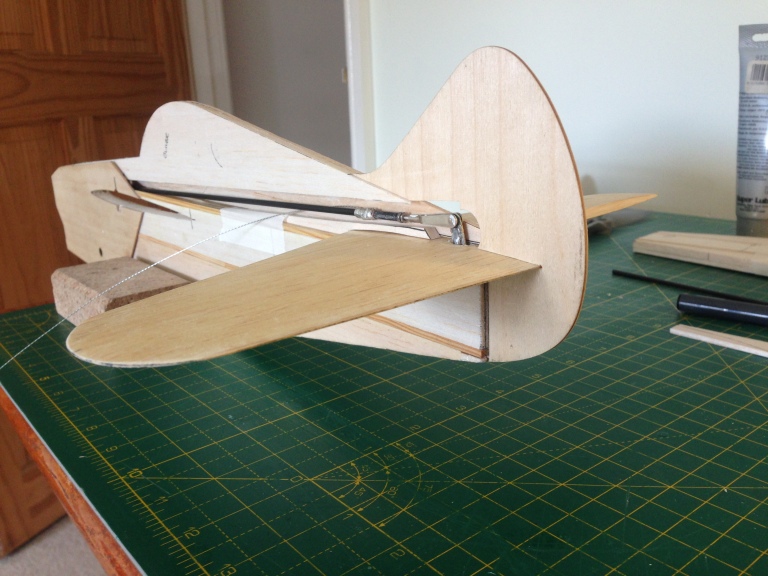
This shows the fus. top template. The top spruce strip had to be relieved to clear at the bellcrank end, the clearance at the horn end was reduced to keep the rear end tidy. The fin is from 1/16th ply.
Next step s to add 1/16th balsa fus. sides, a bit of a clamping job:
")
")
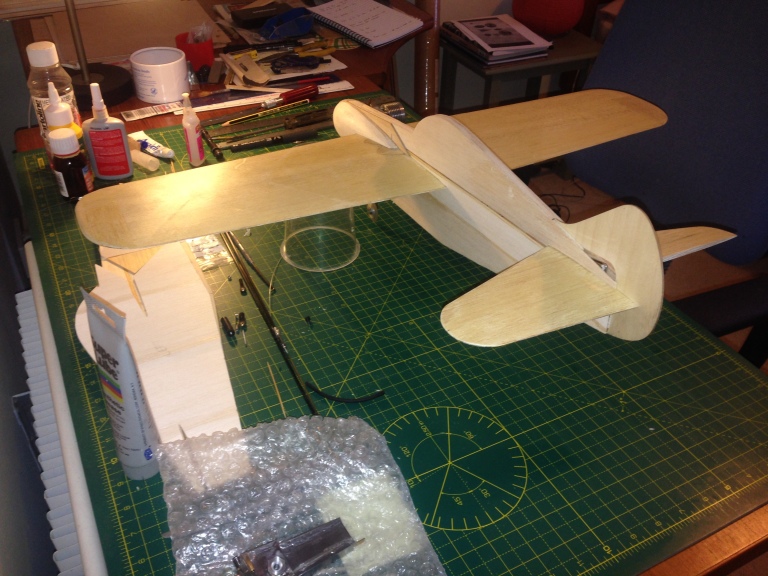
Fuselage is now properly fat, a full half inch wide, it’s time to remove some beef, close the rear and and glass-cloth cover.
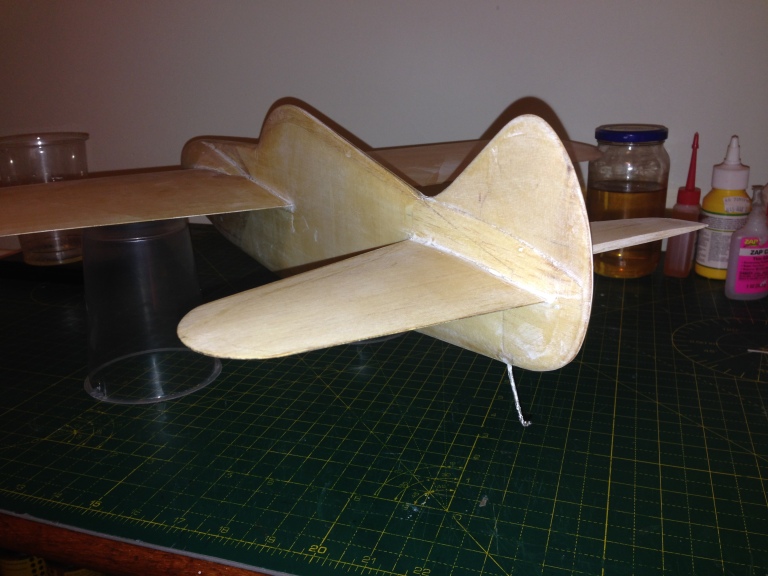
Next are fillets from epoxy and microballoons then paint!
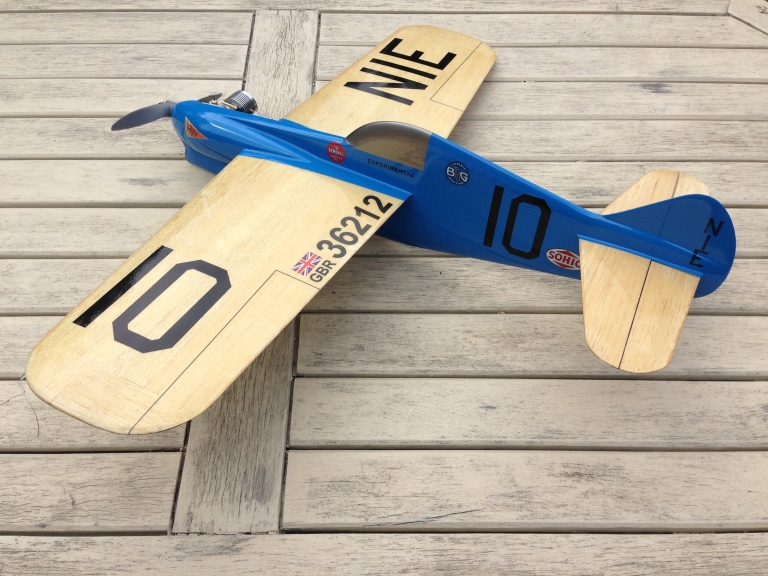
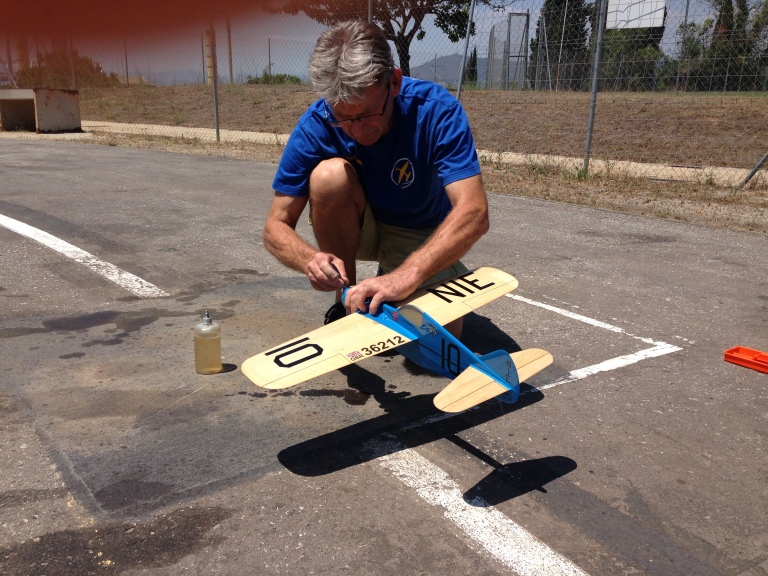
This model was raced at Barton and early indications showed that the stubby high wing was not a favourite with pitmen and the prime needs sorting for quick starts. However the model flies well and is raceable.
A second model was underway for a trip to Barcelona for the Spanish Nats, this time for Parra AAC power.Modifications included an external pushrod, smaller elevator and a 15cc tank. The colour scheme stayed.

")
A great weekend ensued in Barcelona. A huge thanks to the organisers for their kind welcome and hospitality. A few technical issues led to a chaotic final and second place was salvaged rather than won!
After my return to England I decided to build an Argander for British Goodyear. The model was to be built as simply (quickly) as possible for the upcoming British Nationals. Once again Oliver powered for British rules, using Needham hardware and flying on Staystrate lines.

Simon,
First let me say I enjoy your web site thank you. The highlights for me are the model build details. I have not built a Goodyear or F2C type model in 40 years plus so things have changed!!!!1. Your detail and explanation are excellent and show how it can be done and done well. By coincidence I communicated with Sion today and purchased a motor ( Oliver Cub ) from him. Will use it in 1/2A Team race build but only as a fun build not to race. I live in the US but am an ex-brit who has never grown out of C/L team racing. Much success in 2017 and beyond.
Cheers.
LikeLike
Hi Graham, thanks for your kind words. Many things have changed over the years, the enjoyment for me has been rekindling old friendships and relearning building skills and then sort race-ready models.
Sion and I had the pleasure of a whole days testing prior to the Nats, on a sunny Friday at Barton. Great day, followed by an excellent competition.
I’d be interested to see your 1/2A model when completed. Enjoy.
Simon
LikeLike
Hi Simon, Tks for the follow up and comments. I understand about the total hobby as the relationship which to my mind is a very major part of why we build/fly models. The very people we fly against are our friends and help us improve!!! To others strange to us just another part of the hobby. I am retired so have the time and fly more FF than C/L but I try and keep up with whats going on. There is much more C/L activity in UK & Europe than in the US , also true of FF by the way. Good luck in 2017 and if you have any ideas on a 1/2A TR model to build I am open. I was going to build a scaled down version of Dave Clarkson’s “Simple Sprint” . Cheers.
LikeLike
Hi there – very interested in you build logs, and I learn a lot from them. One question, what epoxy do you recommend and what type of glass? If you thin it, what do you thin it with.
Cheers
LikeLike
Hi Ralph, thanks for your comment. I have used low viscosity Araldite resin in the past, I believe a modern equivalent is LY & HY 5052.
I’m currently using Alchemie H574 and EP574, (easily available in the UK) again a low viscosity and fairly long cure resin. It also has some useful post cure properties.
In our application the ability for a resin to fully cure when spread in thin layers is what we’re after. Combine this with excellent mechanical and strength and total fuel resistance and I can easily justify the cost of these materials.
I would personally hesitate to thin epoxy resin, I believe this practice came from a time when suitable viscosities of resin were not available. Now we have a choice.
As a final noteI suggest to thoroughly familiarise yourself with the manufacturers data sheets, they can contain some very useful nuggets of information.
Best wishes on future projects, Simon
LikeLike